Candle Holder from 2 x 4 Scraps.
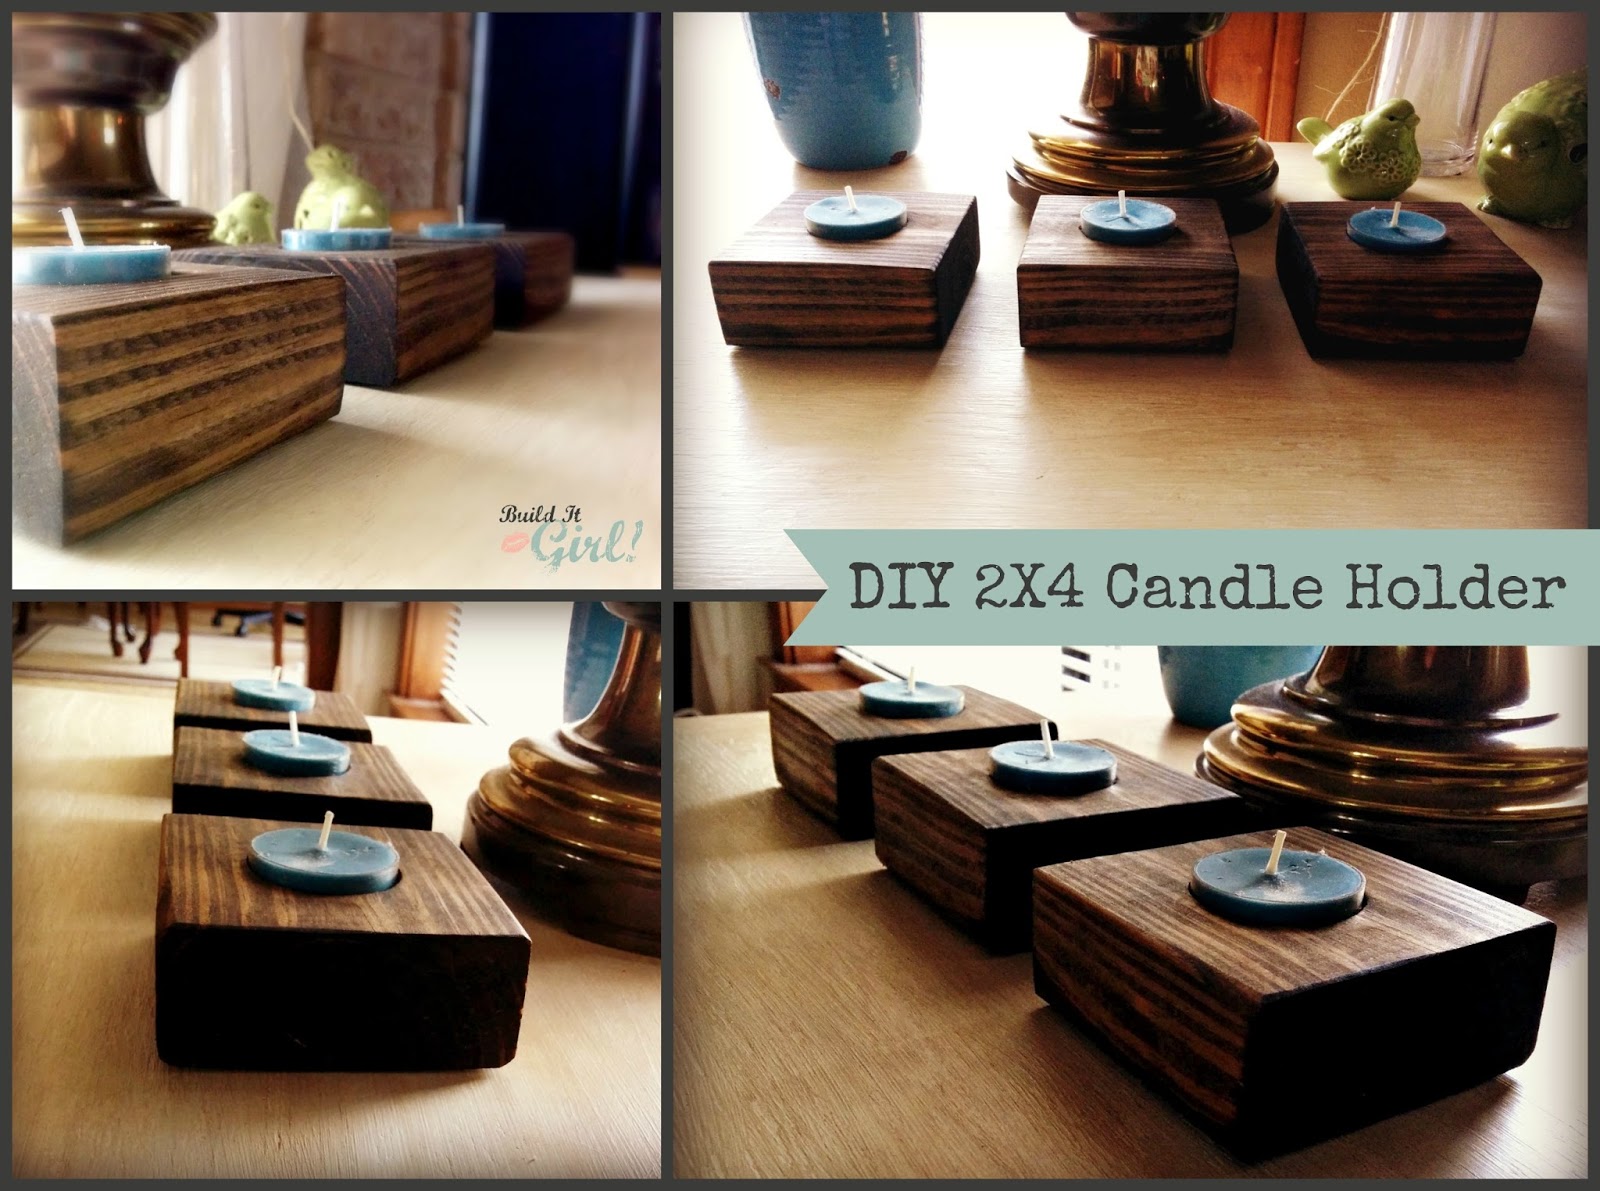
What do you do with your #2X4 scraps? Why not make a candle holder?
There’s lots of cool things out there that you can make with just 2X4s, in fact this weekend I’m going to share with you the new workbench I made specifically for my new compound miter saw, all out of 2x4s.
Bigger projects leave you with a lot of little 2X4 scraps and there is a lot of cool things out there that you can make with them. So with all those little scraps laying around I thought, “Why not do something with those, instead of just throwing them in the 2X drawer or (gasp) the trash!)
Why not make little simple chic candle holders?
What you Need:
- Scrap 2X4s – or if you don’t have any, go to the store and get a 2X4 and then make a set for all your friends
- Pencil
- tape measure
- straight edge of any kind
- saw (circular, compound miter, hand saw… just anything to cut the wood)
- drill
- spade bit for your drill at 1 1/2 inches
- paint or stain
- poly (or wax if you’re using chalk paint)
- sander and/or sandpaper
- tealight candles
- clamps
- rubber gloves (unless you like the dirty finger nail look after you stain!)
Ok, it seems like a lot of stuff, but really it’s not!

| See those sample paints in the background?? Getting a color of your choice in those is great for this kind of project! Not to mention, sometimes you can get ‘mistake’ sample pots for like 50 cents! |
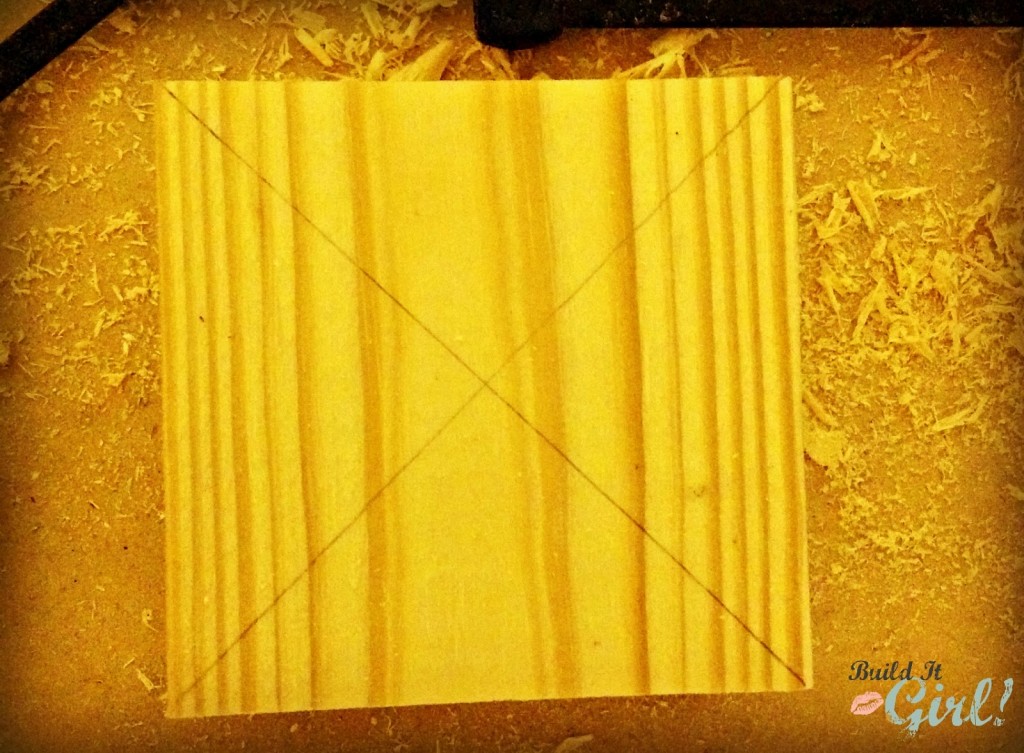
Step One: Did you know that a 2X4 is neither 2 inches thick OR 4 inches wide? Isn’t that annoying…? So, to start, grab your 2X4 and measure across the width (which should be 4 inches, but is not!), take note of what that measurement is. Now you’ll want to measure along the length of your 2X4 and make a mark at what you measured for the width. For example if the width of your 2X4 is 3.75 inches, then measure down the length to 3.75 inches, this will ensure you have a square candle holder.
Step Two: Cut at your mark, measure and repeat if you want to make more.
TIP: Do not mark all of your pieces on one length of wood and then cut them all. Always mark, cut, mark cut… WHY? Because when you actually cut your piece you are losing some length on your board via the blade- it may only be eighths of inches, but the end result will be shorter and shorter pieces. And while we’re talking tips, it’s always a good idea to start your 2X4 with a cut – just a very small one to cut off the end to make sure you are starting with a square edge to begin with.
Step Three: Now that you have your little square piece of 2X4, take your straight edge and make an X across the top from corner to corner – the intersection of these two lines will be the center of your piece and where you will make your hole.
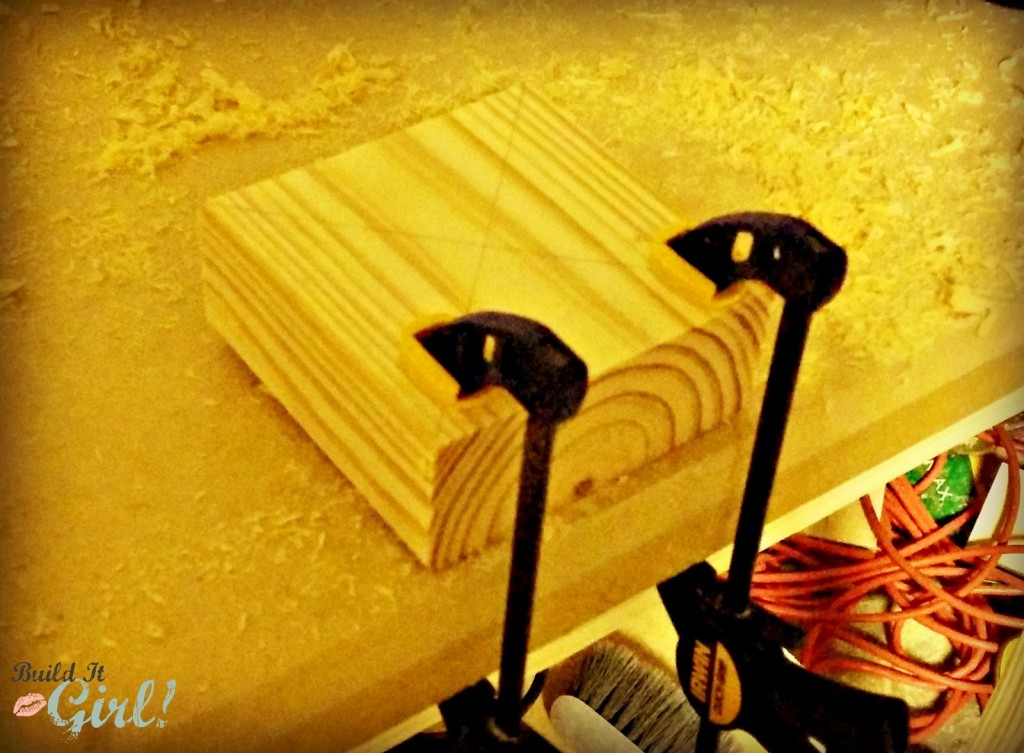
| isn’t the grain on this wood pretty? |
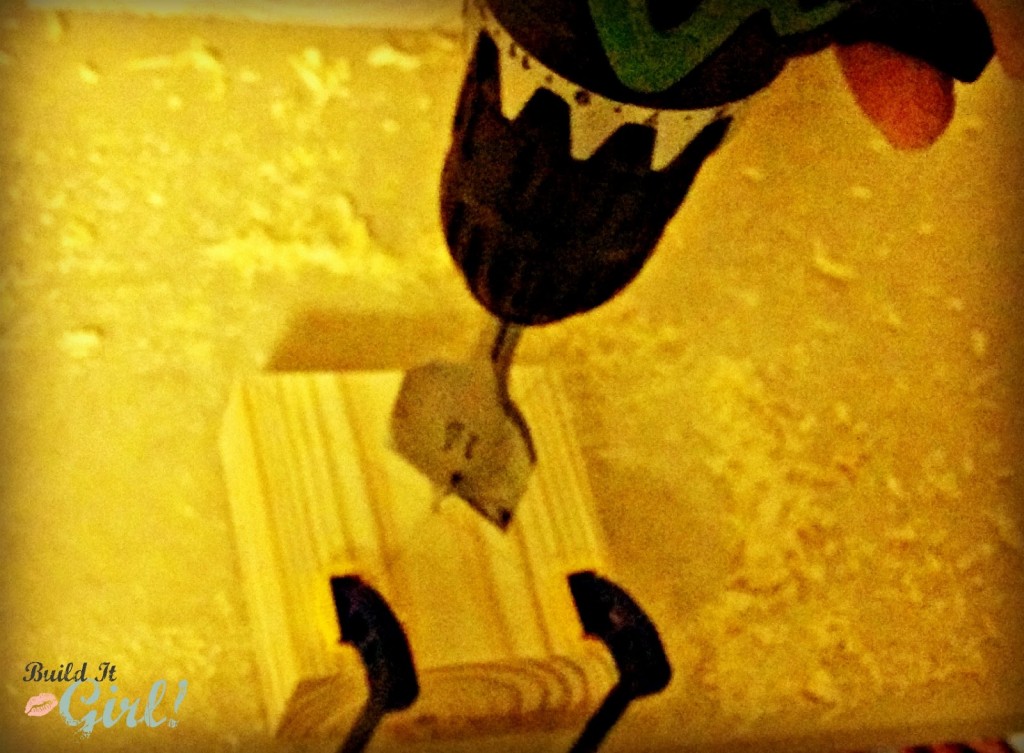
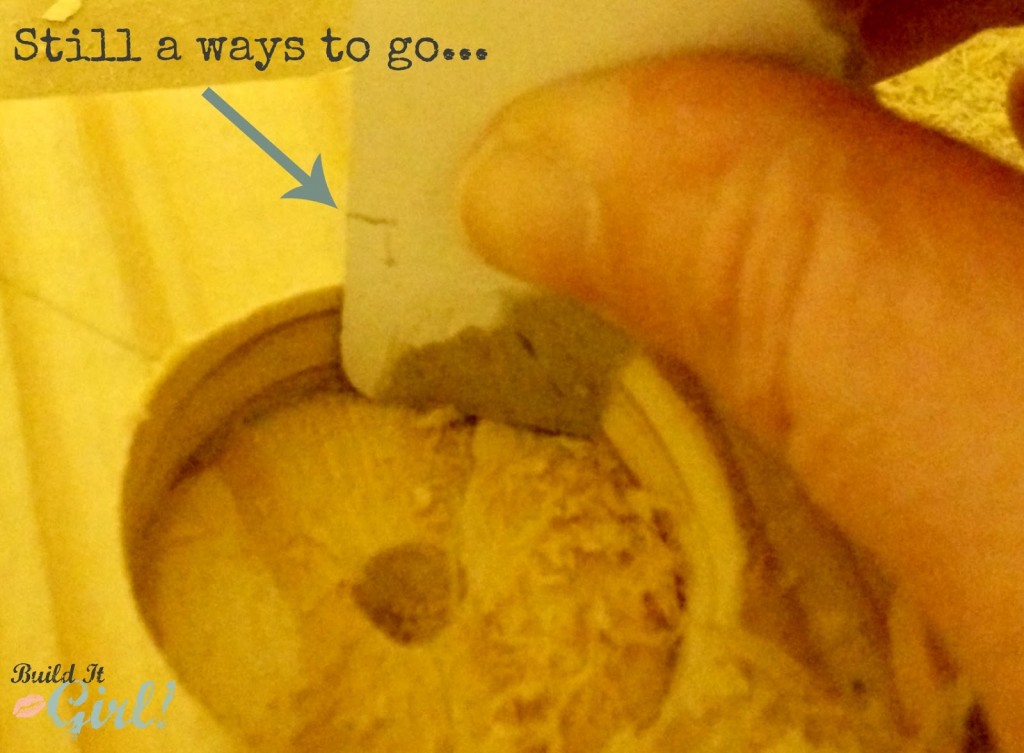
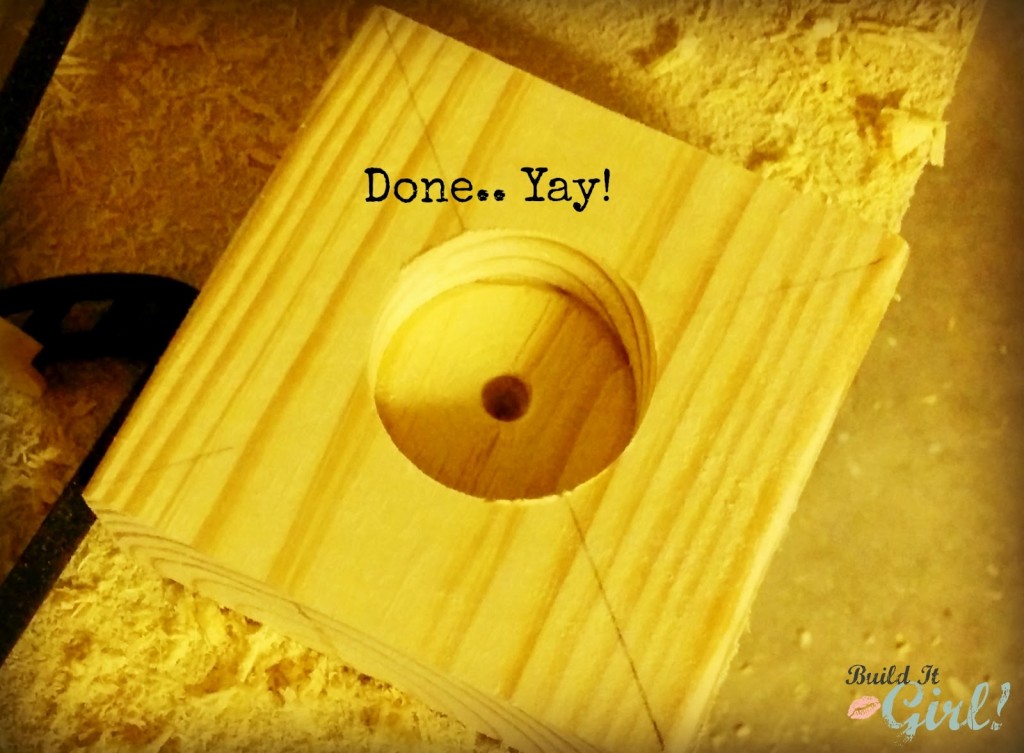
Step Six: Whew.. is your arm tired from drilling? Now it’s time to sand this little guy! I used 325 Grit Sandpaper that was already on my sander, you can do it either by hand or on your sander. Sand all surfaces and round off your corners. (don’t forget to charge your drill while you’re doing this!)
TIP: While catching your finger on the sander probably won’t send you to the hospital, it isn’t fun either! So for this little piece of wood, I would suggest grabbing your clamp again and clamping it around your wood and use that to hold it while you sand it.

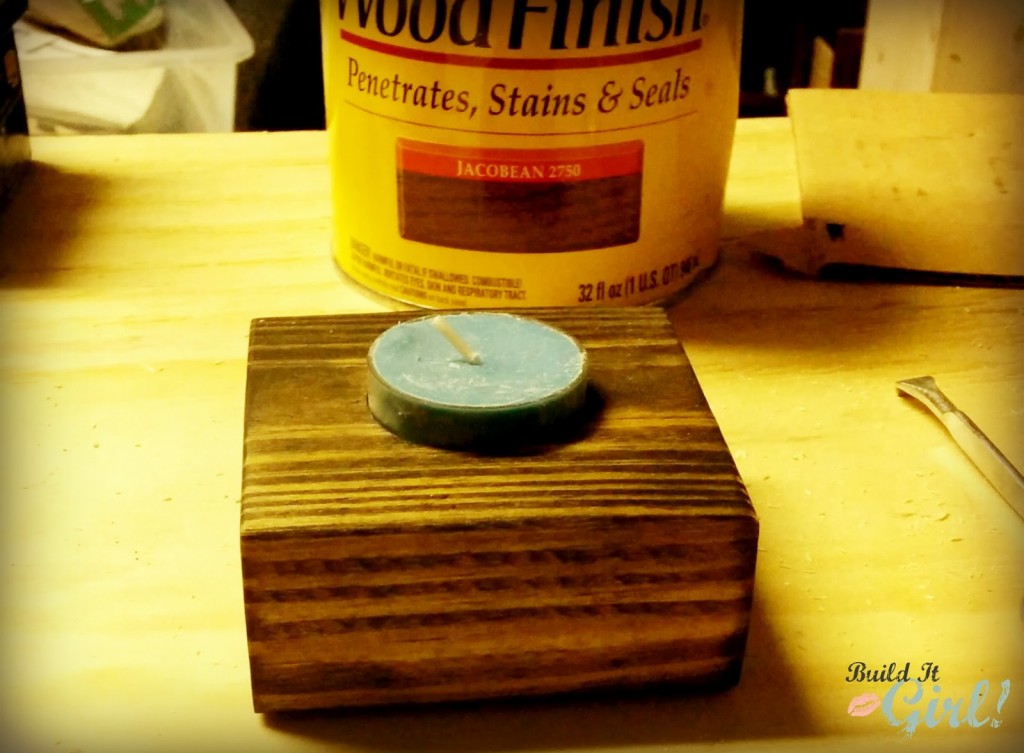
Step Seven: Finish your candle holder. I stained this set because the wood grain was so pretty (I used Jacobean stain by Minwax). But, maybe you want to paint them, maybe spring colors for easter, heck, maybe you want to paint them like an Easter egg for your Easter table, or what about a colored stain, or cool spray paint that dries with some kind of texture… the possibilities are endless!

| here’s where the plastic gloves would come in handy! |
All Done. Enjoy the Light. 🙂